Vasisthasana
Vasisthasana is named after a sage called Vasistha. He is named in the Ramayana as the Guru of Ram ( Rama) He is considered to be one of the seven sages who made it into the stars of the Great Bear.
According to Light on Yoga, the side plank posture as it is often called, works on the wrists, the arms and the lumbar and coccyx areas of the spine as well as toning the legs.
What isn't mentioned is the strengthening effect on the quadratus lumborum muscle. This muscle has its origin at the back of the iliac crest ( the top back of your pelvic bones) and inserts into the lowest rib and the first to the fourth lumbar vertebrae.
This therefore is the muscle that connects your hips to your ribs, one on either side of the body. If one of the quadratus lumborum muscles is weak that will cause a posture defect and a tilt in the way the ribs are held with respect to the spine.
For people with lower back pain it is really important to make sure their posture is symmetrical and often working on the quadratus lumborum muscle will really help them.
Vasisthasana is a difficult posture for most beginners and for a person with lower back pain there are simpler stages of the posture that should be practised and mastered before progressing onto Vasisthasana.
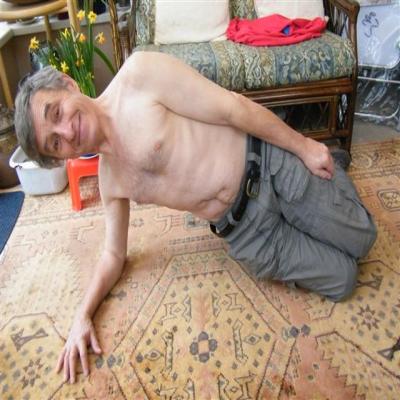
This gentleman is holding the easiest side plank posture. He has given me permission to use the photo even though it was taken during a back care assessment.
To do the first practise step of the side plank posture. ( This can be used by people with lower back problems but if it is too demanding, there is an alternative way to start strengthening the side muscles using a wall, see at the end of this section)
Step 1
Lie on your side.
Step 2
Bend your knees
Step 3 Place the lowest arm so the forearm is in contact with the ground and the upper arm is as close to vertical as possible.
Step 4 On an out breath, try and lift your side away from the floor so you balance on your knees and your forearm.
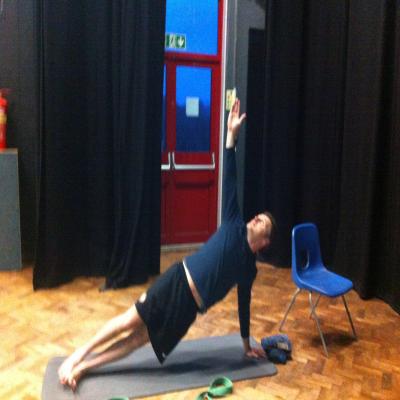
To do the second practise step of the side plank posture
Step 1
Lie on your side
Step 2 Place the lowest arm so the forearm is in contact with the ground and the upper arm is as close to vertical as possible.
Step 3 On an out breath, try and lift your side away from the floor so you are balancing on your forearm and your feet
Step 4 Lift the top arm up. ( To begin with you may find it easier just to lie the top arm along the top side of your body )
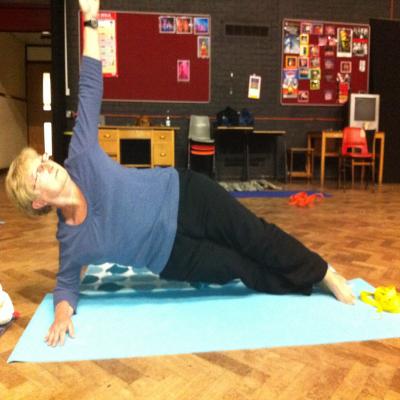
Below the student is balancing on her forearm. Her top foot has come across to help her with her balance. This makes it harder for her to lift her body away from the mat. Her next step is to try and place her feet side by side, like the student in the photo below this one.
This student has stretched her legs out and is also balancing on her forearm. Once she is comfortable holding this pose, she can try balancing on the extended arm.
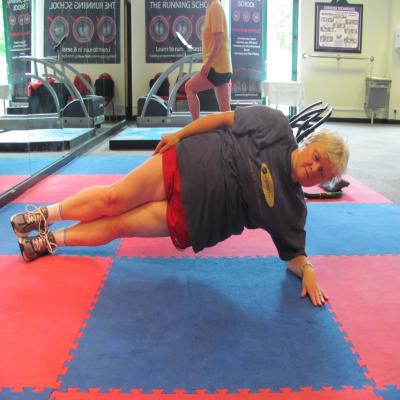
There is yet more you can do with this pose. You can catch the top leg and lift it up towards the arm.
For those who have problems doing any of the variations on the side plank, you can stand beside a wall and place the forearm against the wall. Take a step away from the wall and then use the forearm and the muscles in your side nearest the wall to move your trunk away from the wall.
As always make sure you practise on both sides and if one side is weaker than the other try and practise more often on the weak side.