Parsvottanasana
Parsvottanasana comes from the Sanskrit Parsva.. side.... ut .. intense tan... stretch. So it is an intense side stretch.
You place your right foot to look to the right. You place your left foot so that it is almost looking to the right as well. If you are into degrees, you are making roughly an angle of 10 degrees with a line drawn between the insteps of the two feet.
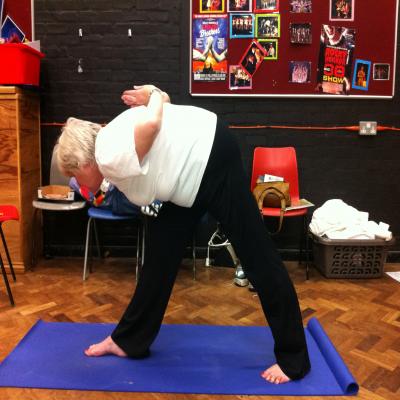
Now the important bit, bring your left hip forward so both your hips are at right angles to the line of the right leg. This works the hip extensors and is often tricky for new students. In the picture below, the student is using the chair to take her upper body weight while she works on aligning her hips properly.
On an in breath, lean backwards and then on an out breath, come forwards taking your head down towards the floor.
It is very important to realise that small movements with the correct position of the back and the legs are better for you than taking your head down lower. The head lower position may look more spectacular but if you have lost your neutral spine shape and your knees are bending like mad and your chest is not open, you have lost the restorative features of this posture.
This student is using a chair to help her align the hips. Remember that when you are practising hatha yoga, you want to relax into the posture and it is while you are relaxing that the body enables you to deepen the posture.
Ideally you place your hands behind your back in this posture in a prayer position. As you bend forward, most students find that they can feel the pressure between the two palms changing and growing less. To keep constant pressure you need to open your chest, concentrating on bringing your shoulderblades together and lifing your elbows which will help keep the pressure on the palms the same.
If it is too difficult to place the hands in prayer position, think about the reason for doing it, namely keeping the upper spine in neutral spine shape and opening out the chest. So you could fold your arms behind your back or just hold your hands behind your back. Keep thinking about your shoulder blades and bringing them together and that you are opening your chest.
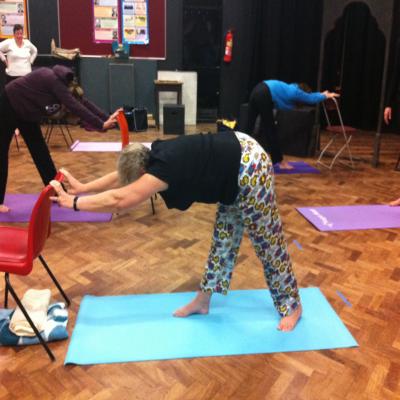
If you look at the main picture you can see that the top of the spine is curving. The student needs to open up the chest more and needs to concentrate on pulling the shoulder blades together. The student practising with the chair has a much better back position!
Bending forwards may be really difficult to begin with. Imagine your legs and your back are straight sticks. Just bend from the hips as far forward as you can with the legs and back still straight. If that isn't very far at all, do not worry. Gradually as you practise you will bend further forward but it doesn't matter if your progression is in millimetres a week, as long as it is a progression.
This posture is quoted as a good one for digestive problems but to get the benefits for the digestive system you really need to be able to lie your trunk along your thigh. If you do have a tummy ache that feels like a digestive problem you can do this:-
Bend the leading leg at the knee, until you can manage to lie the trunk along the thigh which will give the abdominal organs a feeling of a massage. Always go over the right side first and then the left, so you are activating the lower intenstine in the direction it works to expel matter. This can really help.
This posture helps take pressure of the sciatic nerve if it is being caused by a tight piriformis muscle providing the hip movement is done properly.